Amphibia Costumes - Armor Color - Part 1
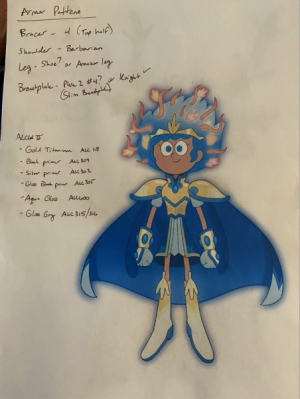
Jumping around a touch, but figured I'd share an update about the armor color choices. First off, as a reminder, these are the two images we're working from to create these characters (
link). Anne has a gold armor (with three different shades) and Darcy has a dark purple/black (with two different shades). Both have a metal appearance. This is why we invested in the airbrush setup because we didn't think we could achieve the look we were aiming for with acrylic based paints. I spent a lot of time reviewing different options and ultimately settled on the Alclad II brand lacquer (
link) based paints based on the following videos:
One of the most important advantages of Alclad II was the flexibility of the paint and how it didn't break up when flexed. So we're hoping that's true for most of their lines of product.
I've purchased them either through
Amazon or Ebay as neither seems to have them all.
We're still in the testing phase, but here's what we've done thus far.
First off, I put down two layers of Flexbond (
link). I'm still on my original bottle, so it goes a long way. I used a paint brush to apply it to a piece of 2mm thick high density foam (
link). In varying thicknesses, this is the foam we plan on using to construct the armor.
After two layers of Flexbond and allowing it to dry overnight, I then laid out a grid pattern for testing out my 12 different combinations.
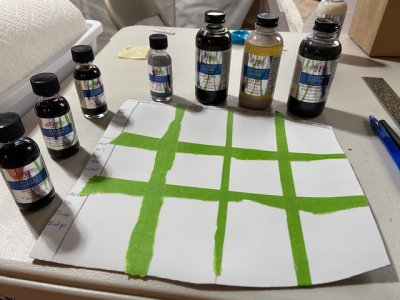
For bases, we're initially testing the following:
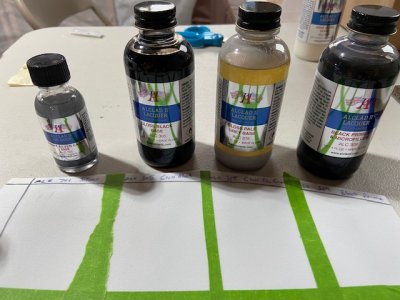
ALC 701 - Bright Silver Candy Base
ALC 305 - Gloss Black Base
ALC 315 - Gloss Pale Grey Base
ALC 300 - Black Primer & Microfiller
Each of these have different preferred number of applications and pressure settings on the airbrush.
For colors, we're initially testing the following:
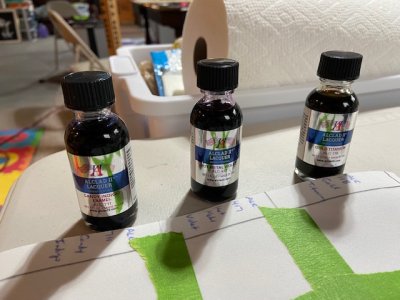
ALC 118 - Gold Titanium
ALC 417 - Hot Metal Violet
ALC 711 - Candy Indigo Enamel
For application, I went through and added a layer as described of each of the bases. I should note that some of these look vastly different in person than they do in pictures.
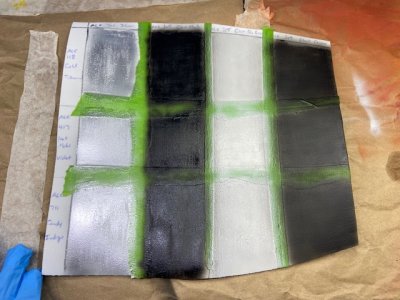
The ALC 701 bright silver gives off a true metallic appearance, but shows the brush strokes way more. The first three are all shiny, and the fourth has a more matte appearance.
ALC 701 only calls for a single layer, and it's possible it was already in a good place, but I went ahead and added another layer. The other three called for 2-3 layers.
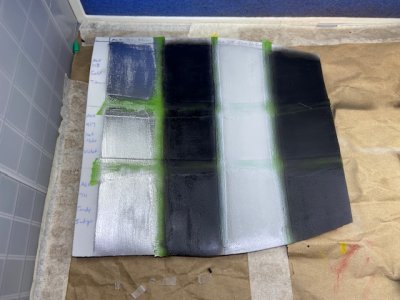
I don't think it harmed anything having a second layer for ALC 701. The other three definitely benefited from the second layer. I let everything dry overnight and checked it the next morning.
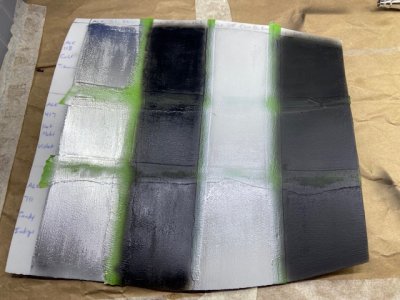
Ultimately, the appearance the next morning was overly different than right after the application. Maybe a little more shine in the bright silver. After showing these based to G, and without even applying the colors to them, she was most interested in ALC 701 Bright Silver Candy Base. Which is hilarious to me. Because we spent a lot of time reviewing Youtube videos, and she was adamant she didn't want the super reflective metal appearance because that's not "tv show accurate". But I told her there's a difference between tv shows and real life. It's really hard to draw reflective surfaces in a cartoon over and over because it requires so much extra work. And so in real life, they're metal armor may very well be reflective. Once I gave her this explanation, she encouraged me to buy the even better and more reflective bases (ALC 107 Chrome and ALC 124 Black Chrome).
One thing that was very evident is the importance of the Flexbond layer. I wasn't completely accurate in my airbrushing and some of the base ended up on portions of the foam that I didn't apply Flexbond to, and those sections turned out completely different and blah. So the stroke pattern and doing it period is really important for the Alclad II paints to work well. I was going to skip that step, but you can't.
Next up was applying the colors. So all the bases were vertical, and now the colors were applied horizontally. So ultimately we'd get 12 different combinations. Again, each of the colors had their own instructions on application. Additionally, some recommended different base choices, but we wanted to branch out and try several different just to see what happened.
After the first application:
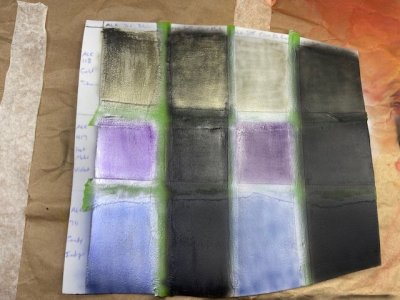
ALC 118 Gold Titanium was super spotty on the three other bases (305, 315, and 300) but it really stuck well to the candy base base (701). I was really surprised to see that neither the violet or indigo worked on the two black bases. They both worked well on silver and grey, but definitely needed more layers.
After a second layer:
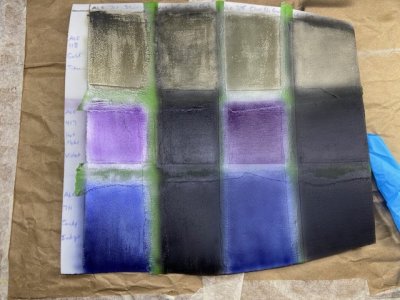
All three colors got a second layer. I'm not sure the ALC 118 Gold needed another layer. It was in great shape after two layers. All three gloss/shiny ones are super reflective. The matte has a different appearance. G's top choice is the first quadrant (ALC 701 Base and ALC 118 paint). So that'll cover the majority of her armor, and then we'll need to figure out options for the other two slightly paler golds.
For the Darcy costume, it was clear the second layer of violet and indigo wasn't enough. Still to blotchy, and not quite the color we're aiming for. So I added a third layer to both. I'd say there were 20-30 min between layers.
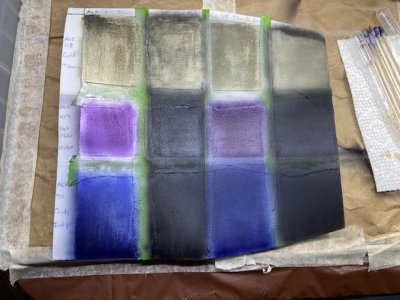
After the third layer for violet and indigo, they were definitely darker and less blotchy. So I think that's a good ending place for them. We let the whole set sit out overnight to dry.
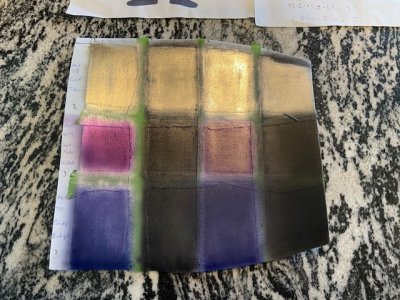
The next morning saw little change from the evening prior. The ALC 118 gold is noticeably gold from any angle, and has a high shine in light. The ALC 417 violet and ALC 711 indigo are definitely light dependent. If you're off direct light, then they're both a deep dark color verging on black. But then in light brighten up to the rich violet and indigo colors. G isn't sold on either being the right color. I'm more in favor of violet, and Steph thinks the indigo is closer to right. Alclad only has one other violet (it's a candy violet) so we don't have many other options. I've got a couple of thoughts.
1) I could try mixing the violet and indigo at a set ratio (like 2:1) and then see if it gives me the desired color.
2) I could try painting a thin layer of indigo over the violet to see how much it dark purples it.
I'm also interested to see how the violet and indigo appear with the new bases of Chrome and Black Chrome. I've got some hope for Black Chrome giving me that desired slightly darker purple on the violet color.
We also ordered one other Gold (ALC 706 Candy Golden Yellow) to see if we can get a slightly different tone of gold for the Anne costume.
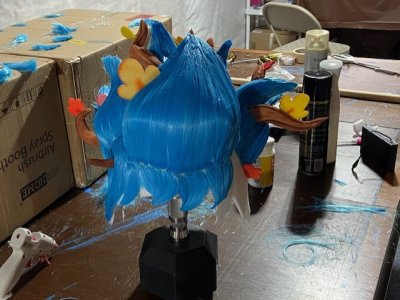
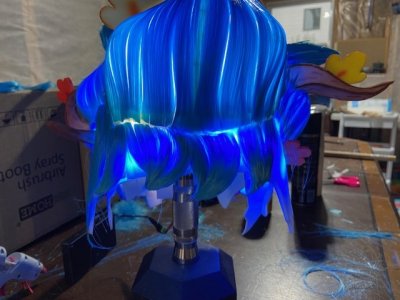
All in all, it was nice to change things up for a bit and work on a different aspect of the project given so much time has been placed into Anne's hairpiece at this point. The airbrushing was definitely the right choice. The final product at this point is far superior to what I would have been getting with the acrylic based paints.
Next -
